In-App Purchase with StoreKit 2 — Using Xcode locally without AppStore Connect Account

In-App Purchase
In-App Purchase a simple and secure way to purchase digital goods or services in your apps across all Apple platforms, so people can start playing, gaming, reading, and more.
Apple has four types of In-App Purchases:
- CONSUMABLES: Can be purchased more than one time. It has a specific expiration based on consumption, duration, or business logic.
- NON-CONSUMABLES: Purchase once and use as long as want.
- AUTO-RENEWABLE SUBSCRIPTIONS: For a limited duration with the auto-renewable feature.
- NON-RENEWABLE SUBSCRIPTIONS: For a limited duration without auto-renewable feature.
Previously, we used the StoreKit framework for over a decade for in-app purchase features supporting StoreKit supported iOS 3.0+, iPadOS 3.0+, macOS 10.7+, tvOS 9/0+ and watchOS 6.2+
In-App purchase was a real pain with too many configurations/ steps/ processes before even writing a single line of code.
Step 1: App Store Connect access.
The customer/client might not want to give you access to App Store Connect. You have to convince him/her as you want to understand all prerequisites before starting implementation.
Step 2: New application needs to be created on App Store Connect.
Your application might be partially ready, or your customer hasn’t been sure/is still in progress around meta-data for AppStore like app name, bundle id, SKU, and other app information.
Still, you have to do it as you don’t have a choice. :)
Step 3: App Store Connect should have Agreements, Tax, and Banking agreements agreed upon and accepted state.
The Account Holder will be able to do it.
Step 4: Create test/sandbox users for the in-app purchases from the ‘Users and Access’ section.
Until an app is released on the App Store. Make sure to remember the password you set for test/sandbox users because there’s no way to edit this form again.
Step 5: Create actual in-app purchases.
Choose the appropriate category and fill in the information like reference name, product id, pricing, screenshots etc.
Your first In-App Purchase must be submitted with a new app version.
Select it from the app’s In-App Purchases section and click Submit.


Once your binary has been uploaded and your first In-App Purchase
has been submitted for review, additional In-App Purchases can be
submitted using the table below.
Once you add all the required in-app purchases you’ll notice that the Status of all in-app purchases is set to Waiting For Review. Unless you miss some meta-data else status will be Missing Metadata.
Now you are ready to implement in-app purchases.
Let’s admit it’s tiring and a little overwhelming process/setup…

NOTE: These steps are necessary before uploading an app with In-App Purchases.
We don’t want to compulsorily follow this process before or during development or we might be just getting our hands dirty, or many of us might not have direct access to the App Store Connect account does that means we can not play with in-app purchase?
And magic happened…

Apple released StoreKit 2in WWDC 2021
StoreKit 2 is full of features and benefits but mainly:
Implement and Test your in-app purchase in Xcode locally without App Store Connect
Resources
- Use Xcode 13 and onwards.
Constraints
- Using StoreKit 2 is not possible with Objective-C
- Support iOS versions before iOS 15.0 onwards only
Let’s begin,
Step 1: Create a “StoreKit Configuration File”
1. Launch Xcode, then choose File > New > File.
2. Search for “StoreKit” in the Filter search field. It’s in the ‘Other’ category.
3. Select “StoreKit Configuration File”
4. Give the name. For this example, we name it ‘PurchaseConfiguration’,

In case, you already have an In-App Purchase (IAP’) available for your application on App Store Connect.
You can check the tick “Sync this file with an app in App Store Connect” box.
This will be useful as you already have products defined in App Store Connect that we would like to mirror for local testing.
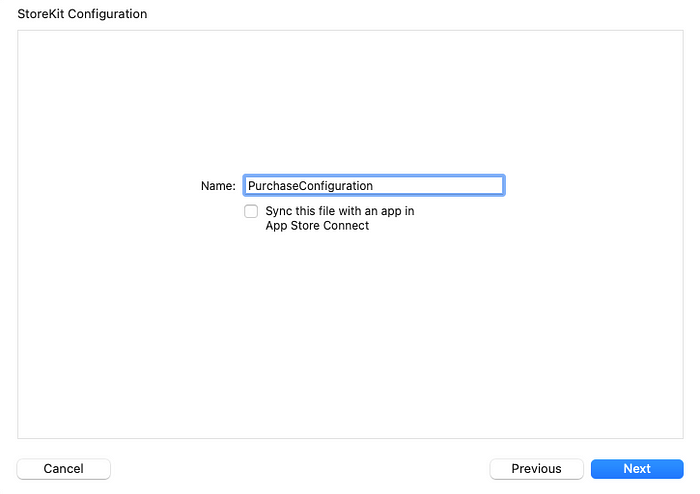
In our case, we don’t have the app created on App Store Connect and we just want to explore the in-app feature.
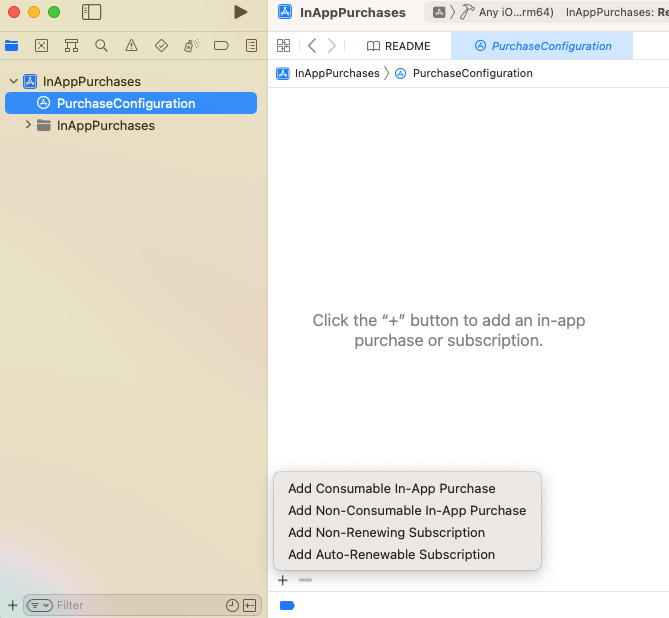
Step 2: Go & select the “PurchaseConfiguration” file from the project navigator
1. Click “+” in the bottom left corner in the PurchaseConfiguration File in Xcode.
2. Select a type of in-app purchase from shown 4 categories of IAPs
Step 4: Fill in the Reference name, Product ID, Price, and localization details like Display Name and Description.
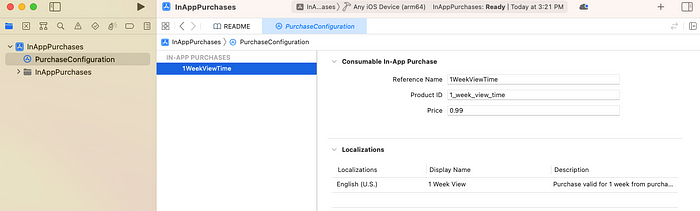
You can keep adding the number of in-app purchases as per your requirement/need.
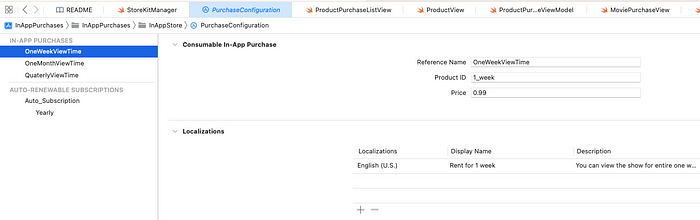
For our example, we have added 4 In-App Purchase products,
- One Week View Time — Consumable
- One Month View Time — Consumable
- Quarterly View Time — Non-Consumable
- Yearly — Auto Renewable Subscription
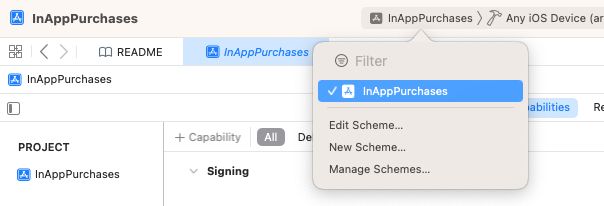
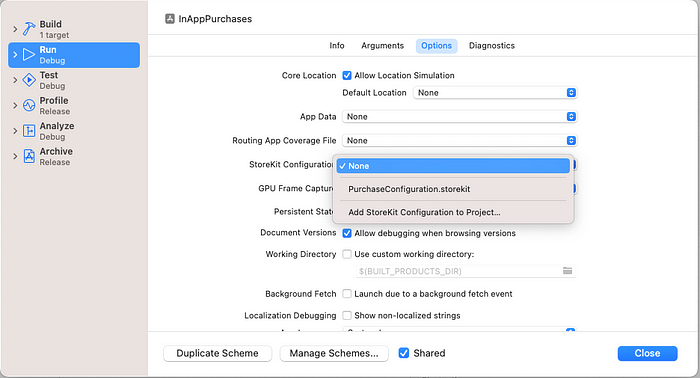
Step 4: Enable the StoreKit Configuration
1. Edit Scheme
2. Go to Run -> Options
3. Select the “StoreKit Configuration” and select the “PurchaseConfiguration”.
It’s the only configuration we have for our application right now.
Our in-app purchase products are locally created and now we can make our hands dirty.
Code Time
Step 1: List down all the Product Ids and have an array of Products to hold the in-app purchase products.
Step 2: Retrieve in-app products and sort them based on price.
Result:
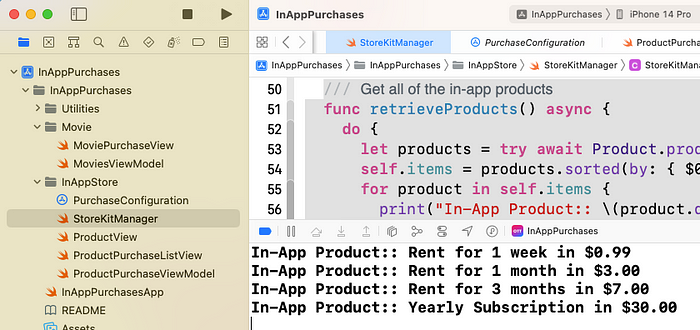
We will get all the in-app purchase products we have created in the “PurchaseConfiguration.storekit” configuration file.
Step 3: Purchase a specific item and you will get the result as a success, pending, or userCancelled.
Now the question is, How to trigger/test the interruption or pending scenarios during testing?
Step 1: Firstly, select the “PurchaseConfiguration.storekit” from the project navigator.
Step 2: Select the Editor menu and click on “Enable interrupted Purchases”.
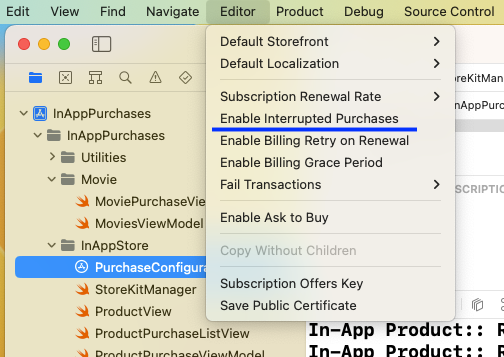
This will interrupt the purchase workflow when you try to purchase the product.
Step 3: Run the application
Step 4: Open the debug area then “Manage StoreKit Transaction” by clicking on the blue highlighted icon.

It will open the “Transactions window” where you can see all the transactions done in the application.
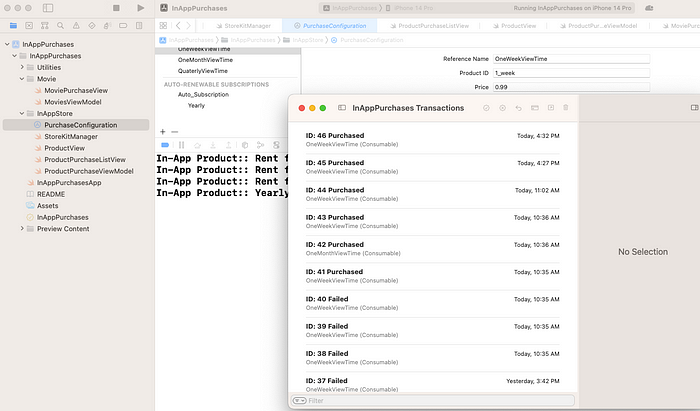
Now when you try to purchase result will be pending for purchase call.
You can see the Failed transaction in the “Transaction window” in the below case ID: 55 Failed.
You just have to right-click and mark it as resolved and it will be turned into a Successful transaction and create a new transaction with a new ID: 56 Purchased in the below animation.
Now the question is, How to trigger/test the failure scenarios during testing?
Step 1: Firstly, select the “PurchaseConfiguration.storekit” from the project navigator.
Step 2: Select the Editor menu and click on “Fail Transactions” and select error.
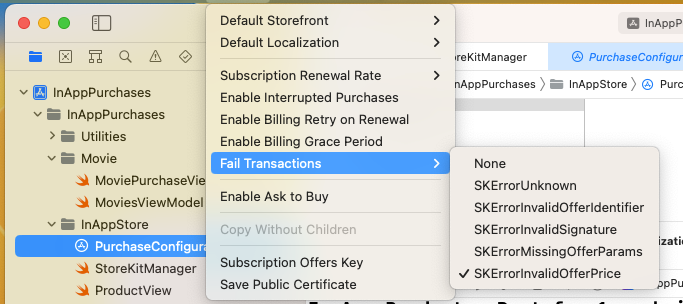
Run the application and try to purchase again…
You can get the entire code for the application here.